Sunday 23 December 2012

Merry Christmas

We have now had 2 family Christmas parties and we haven't even reached the big day!!  That's the joy of having 2 large families - my husband and I both have 5 siblings.  We are quite a gang when we are all together - which sometimes doesn't include all the family members in body but certainly in spirit.  With locale, shift work and other commitments we don't always get to all be together at one time. 

I cherish these family get togethers at any time, and especially love seeing the newest members of the family as they grow and learn new things.  The wee ones seem to make everyones troubles go away and remind us of the true meaning of Christmas - the birth of our saviour Jesus Christ.

I wanted to take a moment to wish every one of my customers and CTMH sisters & brothers a very Merry Christmas and Happy Holidays. 

May all of your wishes come true and may all your dreams become a reality.


    Jennifer

Thursday 13 December 2012

Pear & Partridge Layout

When we first saw the Autumn/Winter 2012 Idea Book back in sunny, warm, humid, Dallas, TX in July, this paper package caught my eye immediately.  Pear & Partridge is a classic.  The colours of Cashmere, Olive, Cranberry, and Desert Sand, along with the cute patterned paper of partridge and vines, stripes, circles, and Christmas trees grabbed me.  Pair that with the Complements Glittery Rub-Ons, and any layout will sure to be a hit.


To make it even faster, simpler and easier, how about a Pear & Partridge Workshop on the Go.  This kit comes with the paper package, the complements rub ons and an exclusive to the kit stamp set. 
 
I love the quilt type pattern to this layout.  To make this more my own, I added the olive mats where my photos will be placed, and added a couple more glittery snowflakes to fill in some white space.

No matter your style of scrapbooking, Pear & Partridge is sure to be a hit for all your Christmas photos.


Happy creating!

Jennifer


Tuesday 11 December 2012

Try a technique cards


 Every now and again I see different card techniques that I just have to try.  This was one of them and is pretty simple when broken down.  The neutral cardstock is tacked to each other and then stamped across all three layers.  For this card I used CTMH smokey plum to colour the flowers.  Once finished colouring carefully separate the three layers, mount on mat 1/4" larger and build your card.  I finished off with an image cut with Artiste cricut cartridge and from my stash added some chocolate grosgrain ribbon.


This card is created with post-it notes, a circle punch and sponges.  To make the snow tear a post-it note in the shape wanted and place across the bottom of the base.  Punch out a circle from the sticky part of the post-it note and place in the upper right corner.  Using a sponge I used three colours of blue and inked the base to create a sky. Remove the post-it notes and stamp in black ink the trees and sentiment.  I used yellow to sponge the moon. 


I know I found this card on a fellow CTMH consultant's site, but I didn't write down who it was.  This card uses the Victory paper package, and I wanted to show you how a simple card can be quite effective.  Layered and edge distressed using chocolate ink, foam tape to pop the image and you're done. 


I hope you will try these techniques and enjoy trying something new. 

Happy creating,

Jennifer

Monday 10 December 2012

Where in the world???

It's been a while since my last post.  I have been caught in the holidy hustle and bustle along with basement rennovations.  My temporary scrap room has been taken apart.   I'm trying to decide where I'm going to set up again following our basement rennovations.  I have had to downsize my space and have had to get creative with my set up.

Thank you for being patient with me as I get up and running again.  I promise to post pictures of my new space and artwork in the next week (or so).

Happy creating everyone.

Jennifer

Wednesday 14 November 2012

Oh Baby & Thank You

Catchy title?  Okay maybe not, but my cards today are to welcome those new wee ones - boy & girl and a thank you card thrown in there.  All the supplies mentioned are from CTMH. 

 This is my baby girl welcome to the world card.  The sweet giraffe is stamped in blush and then stamped again, cut out, and popped up with foam tape for added dimension.  Creme brule ribbon and pink brads and pin complete the card.  The stamed images are from Zoology.  The paper package is Lucy.
 I love this rubber ducky!!!  It is punched with a 1/34"  and 1/1/2" circle punch, with the wing cut out with a scallop punch.  The eyes are punched with the long reach circle punches (retired) and the beak and hair are just free hand slivers.  The ribbon is from the blue collection, and the paper package is Pemberley.   

Cute for the baby boys right?


My thank you card uses the Stella paper package and Casual Expressions stamp set.  The image is of course cut with the Artiste Cricut collection.

Durable square studs and bakers twine from the harvest assortment provide the embellishments needed. 


I think my little scrap room is working out pretty good.  I hope you enjoy these cards and find yourself some creating time.

Jennifer

Sunday 11 November 2012

Cards for Fun

My good intentions to update and revamp my blog have been put on hold.  My scrap space has been packed up into boxes, my storage unit torn apart due to a flooded basement.  Yikes, not what any paper crafter wants to face.  Luckily the water stopped flowing just where my space starts (I think divine intervention was at play) and nothing was damaged.  We will face a bit of a rennovation and rebuild over the next few weeks/months as the basement repairs start. 

My heart goes out to the flood victims of Hurricane Sandy - I cannot imagine what they are going through and in no way does my basement flood compare. 

I have for the time being taken over the sunroom upstairs and for some stress relief spent the day creating yesterday. 

 I recently discovered Pinterest (I know I must be the last person) and really liked a card similar to this one.  I embossed the white heart after I cut out the shape and added clear sparkle bling for the buttons.  The black heart has pearl buttons, and a bow tie from ribbon.  The sentiment is stamped and embossed in silver. 

 I was in a stamp swap a few months ago and this little mouse was one of the images.  I love the shorts!! I am learning to colour with my Copic greys but think he turned out pretty good. 

Inside the sentiment reads, "It's your Birthday - HANG TEN"


I loved the Stella paper package when I first saw it, because of the patterned paper design.  My mom, sisters, and niece are all seamstresses, so I wanted to try to create a card just for them.

The Artiste cartridge makes it so easy, the dress form, dress, and hanger are all cut with the cartridge.  The pin cushion and scissors are from an older stamp set.  The pins on the pin cushion are highlighted with silver glitz glitter to give them a shiny metalic finish. 


My little craft room worked out pretty well  -  Happy creating everyone, no matter where your space is.

Jennifer


Friday 2 November 2012

BOO!!!

I hope everyone enjoyed Halloween, capturing those spooky ghosts and goblins in pictures.  I must admit our visitors aren't spooky, they are just plain adorable - too cute to spook.


This layout is the Moonlight Workshop on the Go featured layout.  It is jam packed with great details  including edge distressing, inking, skull brads, sparkle eyes, swiped BOO title, and great stamped images.  The stamp set is only available as part of the WOTG, and includes the cute little mummy, spider, lamp post and more.
 
I love the little spider dangling away, but oohed and awed when the sparkly eyes were added.  This is just a great stamped image that adds tons of pop to the layout.


This little mummy stole my heart.  He is stamped, coloured with smokey plum alcohol markers, cut out and then popped off the page using foam tape.  The BOO letters are stamped with the Trinity Alphabet stamp set,  using the swiping technique and highlighted with black sparkles.
This layout will be the feature layout for November workshop and is also available as a kit Let's get those photos into your scrapbook using the adorable "BOO" layoutor you to assemble at home.
 
I hope you weren't scared by "BOO", and can't wait to help you get your Halloween memories onto this layout.
 
Happy creating,
 
 
Jennifer


Thursday 1 November 2012

Hurricane Sandy - Relief Efforts

I shouldn't be, but I'm amazed at the generosity of Close to My Heart.  Jeanette Lynton knows how to step up!!  

Ms. Jeanette Lynton has done it again - during November, $1.00 for every Stamp of the Month set sold will be donated to the Red Cross Hurrican Sandy relief efforts!!! 

The consultant family of Close to My Heart has been keeping track of consultants in the affected areas, hoping, but knowing not everyone escaped the devestation.   You've seen the news footage, the damage is estimated to be in the billions of dollars. 

Help is needed - you can help!!! 

Jennifer


Wednesday 31 October 2012

Construction in Progress

I'm working on it...

My blog that is...

Thank you so much to my good friend Alyson Mayo for helping me today,spending time I'm sure she would have loved to be creating, helping me with my blog features.

So, there will be some glitches, some hiccups, and some empty spots for a bit, but please stay with me while in construction.

Happy creating,

Jennifer

Tuesday 23 October 2012

Cowgirl Up!!!

As promised, not to be outdone, it's cowgirl time.  We all know girls can handle roping  just as well as the boys, so I couldn't resist this little miss!


Love, love, love this little lass, in her cowgirl outfit and handling that rope as good as the boys!!!

I always find my greys tricky to work with, but I do like how the cowgirl hat turned out - still want to work on my shading, but it's coming along.

The paper package is the same as the cowboy and I'm sorry I don't know the name.


I hope you like my Cowgirl Up! as much as I do.

Happy creating,

Jennifer

Sunday 21 October 2012

Cowboy Up

Sometimes an image just grabs you.  It reminds you of someone, or something and makes you smile.  This little dude did that for me.

While on vacation in Myrtle Beach, I visited a cute little store and chatted with the owner for a while.  She had some great card kits ready for you to simply colour, distress, and put together.  Normally I don't go for kits, but this little guy reminded me so much of my nephew I had to go for it.

I'm sorry I don't know the stamp image name or the company he came from, nor do I know the paper company name.  But I do like it.


I coloured my little dude with my Copics and a myriad of colours.  Sorry, I didn't list them when I was working away, but the shorts are my fave combination of B93,B95 and B97.  Skin colour is E50, E000 and E02. 

I hope you enjoy my card and not to be outdown his "dudette" will show up soon too!!

Happy creating,

Jennifer
    

Monday 15 October 2012

Project Inspiration 2012 Autumn/Winter Idea Book: New WOTG Card Kits


These are both fabulous card kits.  I have completed both and love them!!!  This is a great way to complete your cards quickly - you can personalize too so it is truly your own!

Sunday 14 October 2012

Christmas Cards

Wow - I thought the summer flew by but the fall is flying by even faster.  I can't believe it's the middle of October already.  I was in Myrtle Beach for a week for part of my extended birthday celebrations.  My husband & I had a lot of fun - he in golf school and me - shopping!!! 

I was able to do some crafting yesterday and wanted to share some cards made with the fabulous October Stamp of the Month - Very Merry Christmas.

 Pear & Partridge paper package has great colours, and patterns for all your cardmaking and scrapbooking projects.  I used the Artiste cricut cartridge for the bow.  The pointsetta and snowflake brad are from my stash of retired product.  
 These cute mittens tied with cranberry twine remind me of the days of strings on my mittens hanging from my coat sleeves.   I paper pieced the top of the mitten with another pattern from the Pear & Partridge paper.
The sparkles are from the red/pink sparkle assortment.


This card turned out better than I had thought - the ornaments were glittered up with almond glitz glitter gel.  Christmas is a great opportunity to get sparkly. 


These cards were a snap to assemble, especially with the Artiste cricut cartridge to cut all the shapes.  The carrier sheet from the stamp set makes it so simple to find the image, the page number and size is printed right on it.

I have a few more things I've been working on and will be sharing more artwork in the coming days.

Happy creating,

Jennifer

Tuesday 25 September 2012

50 Years!!!

I've been creating, honestly I have been, but most of my projects are for Christmas presents so I can't share.
I did however celebrate a milestone yesterday..... my 50th Birthday!!! 


 I am the youngest of 6 children and this is my only baby picture - I always give my mom the gears about that!! 

It's funny when you look at your own children's baby pictures and compare them to your own what you discover.

My eldest son, Matt, always holds his hands out to the side and now I see where he gets it from!!!


My hubby brought me home a dozen beautiful pink roses, after taking me out for a wonderful steak dinner with family last Saturday.


But wait....to top it all off we are headed to Myrtle Beach, S.C. one of my favourite destinations for a week of golf, shopping, walking the beach and lazin' around.  I can't wait.

Maybe turning 50 isn't so bad after all.

Saturday 15 September 2012

Run with a View

Today's post is completely not scrapbooking related - unless I decide to scrap these photos - but I wanted to share this with you. 

I am a runner - I am fortunate enough to live in an area where my husband and I can have alternate routes without too much traffic and with fabulous scenery.    
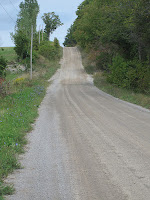
 Unfortunately, none of our routes are without one of the these - - a monster hill - doesn't seem so bad - unless you're footin it up it then it just goes on and on and on and even when you're finally at what you think is the top - it just goes on and on and on.
But once we get to the top, the view is wonderful.  We've watched the sheep all year from wee lambs, and even watched three new Pyranese puppies train to manage the sheep herd. 

I am glad it's starting to cool off though - it makes the run that much more enjoyable.


Happy crafting and enjoy your day - remember to take time to enjoy the view!

Jennifer

Friday 14 September 2012

Adding Color to Your Crafts


Please enjoy this video from CTMH VP Marketing Kristine Widtfeldt.  She is an amazing lady at CTMH and a dynamo always!!
I think I have some crafting to do today - how about you?

Enjoy & happy crafting.

Jennifer
  

Wednesday 12 September 2012

Footloose Layouts


One of my absolute favourite paper packages from the Spring/Summer 2012 Idea Book was Footloose.  This paper jumped out and grabbed me - love at first sight.

I'm catching up on some of my scrapbooking and this layout is from our trip to Cuba in February 2012. 

These crazy pelicans would come in every day when the fish guy showed up.  He would wave a fish in the air and they would fly in and just sit and wait for a fish.


They were so smart they knew when the tourists would hand the guy a peso and get a fish to feed them.  Holy smokes they would attack you to get that fish.  I dropped mine but my sister-in-law stuck it out to feed them.

I used the Footloose complements but I needed some letters that weren't in the kit.  So I used my white daisy pigment ink and painted the letters on - I think it turned out pretty good. 

Seaside Wooden shapes clustered with buttons, twine and more complements provide some fun embellishments.  For my journalling, I used the tag shape chipboard, cut the complementary shape with the Art Philosophy, added Sorbet brad and twine.

Do you know where I got the inspiration for my layout from?  It was right from the Idea Book, page 39  - changed patterns and colours to suit what I wanted and bada bing bada boom - it's done.

One of the things I love about scrapbooking is remembering what fun we had on the trip, especially with those crazy Pelicans.  It was worth the $2.00 we spent. 


Monday 10 September 2012

Create your own Background Paper

My son & daughter-in-law are Star Wars geeks!!!  They belong to a club called the 501st Legion and participate in fundraisers and appearances with their group.  I am always asking for photos and memorabilia from their shows, and was thrilled when they actually complied.  They were at the Ottawa, Ontario, Canada Comicon and raised over $8,000.00 for Hospital for Sick Children, charging $5.00 for posing for pictures with Comicon attendees - that's over 1,600 pictures taken in 2 days. 

I wanted to put together a Star Wars album for them as a keepsake and that they could add to after each appearance.

Problem is there wasn't any paper that really worked for what I wanted for a title page. I wanted to create a darkened sky with stars much like the opening roll on the movies. 

This is what I came up with thanks to my White Daisy pigment ink and texture tool - from Close to My Heart.  I applied ink to the black stipple texture tool  and gently daubed it on the black cardstock.  In other areas I applied more pressure to get the blobs of white.  Then I used the small star stamp from It's your Day, once dry I coloured over it with the silver metalic marker to create a bit of shine.

The blue letters are cut with the Artiste cartridge in Indian Corn Blue.  Thank goodness for our tweezers to apply those letters to the cardstock. Star Wars is stamped with the Posterboard Alphabet in black on Honey textured cardstock, cut out and applied.

I think it turned out pretty good.  With a little imagination, help from the internet for the intro scroll wording and colours and tah dah - opening page.

Now onto figure out who, and what all the characters are in the pictures.

May the force be with me!

Happy creating,

Jennifer


Sunday 2 September 2012

Anniversary Card with Artiste

Just a quick post today to show you an Anniversary card I made using the Artiste cartridge.

One of the most difficult things I experience is knowing when to leave something alone - no ribbon, no bling, just leave it alone and walk away.

So this card is very clean and simple.  I used only black and white and a wee tiny piece of cranberry.  I ran the white cardstock through my cuttlebug with a great paisly embossing plate.

The bride and groom and the wee flower are all cut with the Artiste cartridge.

The inside is stamped "Happy Anniversary" over a third generation stamped heart image - I'm walking away and leaving it alone.


I hope you enjoy my clean and simple Anniversary card.

Happy crafting,

Jennifer
  

Tuesday 28 August 2012

For Sale - My Acrylix Stamps

I have the following stamp sets for sale. 
I have indicated if the stamps are new (N) or if they are previously loved (U)

A1116 - A Melody (N) $5.00

B1395 - So Grateful (N) $7.00
B1360 - Trouble Maker (N) $7.00
B1394 - John 3:16 (N) $7.00

C1471 - Happy Clusters (N) $10.00
C1421 - The Boo Crew (N) $10.00
C1462 - All Hallows Eve (N) $10.00

WOTG - Believe (N) $12.00
D1456 - Chairs to You (N) $12.00
D1330 - Connections (U) $5.00
D1341 - Butterfly Wings (1 stamp used) - $10.00
D1351 - You've Got Flair (1 stamp used) $10.00
D1377 - Around the Blood (U) $5.00
D1206 - Endless Love (N) - $10.00

* Prices include shipping in Canada.  

Please email me for your selection, if you would like a photo or to discuss payment.


Thanks,

Jennifer

Monday 27 August 2012

All About Inks!!!

Are you confused about inks? Water, solvent, distress, pigment, dye - what does it all mean? I've had a few questions so I went back to school with Close to My Heart. The following is only the basics and by no means provides a complete listing of all the ink products available.

There are two basic components to ink - the "colourant" and the "carrier". The colourant makes the paper change colours and the carrier is the liquid that carries the colourant from your tool to the page and then evaporates leaving the colour behind. Colourants can be dyes or pigments and carriers can be water or solvent.

So - lets start with the colourant:

Dye based ink soaks into the surface it is applied to and bonds wiuth the medium to change colour. They dry faster, because they soak in to the paper. They are of a thinner consistency which makes them great for detail and provide a crisp image when stamping an image on matte paper. Ink pads for dye based inks are made of felt.

Pigment based ink are slower drying because they sit on top of the surface. They provide the colour and do not change the paper colour making them great for stamping light images on dark paper - they stand out. Pigment inks are thick - they provide a vibrant colour, and hold embossing powder well. Pigment inks can be dried faster with a craft heater. If your project is going to be exposed to direct sunlight for long period of time use pigment inks. Pigment ink pads are a sponge or foam based pad. Pigment inks because they are thicker do not provide as crisp an image when stamping.

Distressing Ink is a hybrid with both pigment and dye based inks. They are not permanent until heat set. Distress ink provides a chalky opaque look and are achival/fade resistant once heating. They are great for antiquing and distressing all types of projects.

Okay, so now that you've got the basics of the "colourant", lets talk about the "carrier":

Water Based Inks have no odour. The water will evaporate slowly which makes them a great choice when stamping on matte paper. Water based inks can be blended with water. They do not completely dry on non-porus surfaces.

Solvent Based Inks have a rubbing alcohol type scent. They are great to use on non-porus surfaces, such as acrylic, or metal. The solvent evaporates faster than water. Solvent based inks are great to stamp an image outline and then use water based inks to colour inside the image. Solvent based inks are permanent.

Staz-On is a dye ink with a solvent carrier - it will dry quickly on non-porus surfaces. It is archival and fade resistant. It is prone to dry out quickly and is not good to stamp on fabric.

VersaMark is a clear pigment based ink that leaves a watermark image. It drys slowly so is perfect for heat embossing or chalk popping.

Close to My Heart inks (except White Daisy & Colonial White) are dye based water inks on a felt pad. This provides for even coverage when stamping with crisp images. They are great for everyday use on matte paper and as they are water based they can be blended with a waterbrush and provide easy clean-up. White Daisy and Colonial White inks are pigment water based. This allows coverage over darker coloured cardstock. Because they are pigment based the ink pad is foam so images are not as crisp. Pigment inks settle so any re-inker should be shook well before use.

Alcohol markers are the newest addition to the CTMH family. Alcohol markers are great for colouring because you can blend and build the colour up. They will have a rubbing alcohol type odour.

I hope this helps everyone understand the chemistry of inks and gives you some insight into choosing the right ink for your projects.

Sunday 26 August 2012

When I Grow Up... with Scholastic

When I grow up.... I want to be?  When my boys were little I heard things like a hockey player, an engineer, a baseball player, a soldier... What fun it was this week to look back at pictures of my two boys when they were still deciding what they wanted to be when they grew up.  

 Of course one of the other fun things was first day of school pictures.  A time honoured tradition when I was little.  My mom would line all 6 of us up and not only would we get a group shot, but each of us would have our individual picture taken of the first day of school.  

We'd all pose with our new shoes, first day new outfit and of course books and pencils that were crisp and clean.


The left side of this layout - Matt & David were so little - I can't remember the grades they were entering but they are now 28 and 25!!  They always got new ball caps to head back to school and we always took advantage of their babysitter's lovely gardens. 

I stamped the pencils and report card from a retired stamp set called School Rules stamped in the fabulous new colour of Saddle. 


The right side page uses images from the stamp set School Rocks #B1396, and again stamped with Saddle.  The school house, and bus were popped up with foam tape.

The letters are from Canvas Alphabet which I just love.  Topped off with a few durable round studs for a bit of manly bling.


Scholastic paper package doesn't have to be for just back to school.  I have some photos from the Book Depository - 6th Floor Museum, Dallas, TX from my trip this summer which will fit perfectly with scholastic paper. 

This 2 page layout will be the September scrapbook workshop page for my ladies, and I'm anxious to see how they will each put their own spin on Scholastic. 

Hope you enjoyed, and happy crafting,

Jennifer


Monday 20 August 2012

Fun Cards!!!

Sometimes you just want to create some fun cards!!!  I love each one of these little guys and always have fun when I colour.  

The first card was stamped with a great little stamp set called "Just for You"  I love this beautiful flower - cut with my Art Philosphy cricut cartridge, stamped and highlighted with a pewter brad.  The paper is from Stella and the sentiment is from the stamp set "A Little Thanks."  Complimenting colours are Olive and Chocolate - simple but effective. 


The second card is featuring the retired paper package Cruisin' and the exclusive stamp set that came with the WOTG.  This card was inspired by a fellow consultant and I just love how my car is popped off the page and rarin' to go!!!  I rode in one of these cars in Cuba and they look good, but man they didn't have great springs!!!

 I was in a stamped image swap with a number of other ladies and these two images were ones I received.  I love these little girls and couldn't wait to pull out my Copics and colour away.

I ran the background paper through my cuttlebug to emboss the Happy Birthday sayings.  The little girl is mounted on the grey Decor journalling spot and of course every little girl needs some bling - so I added a shimmer brad and some organdy ribbon.  Cute right? 
  I pulled out some old bling from CTMH that has long since retired but was in my stash of goodies to add the pink and green bling down the right side.  I bet some of my fellow consultants may also have this mini-medley in their stash!!
The topiary cardstock mat was edge distressed for a little extra something.  I used the Lucy patterned paper and punched an eyelet border and then mounted on blush cardstock.


I hope you like what I created and maybe I inspired some of you.

Happy creating,

Jennifer
  

Saturday 18 August 2012

Avonlea Card Workshop on the Go

Avonlea paper package is beautiful, featuring 3 exclusive to the kit colours of Avonlea Off White, Avonlea Teal, and Avonlea Green.  These colours are complimented by Slate, Chocolate and Smokey Plum.   

For September's group, we will be doing the Avonlea Cardmaking WOTG, a great value at $29.95.  Included in the kit is 15 Colonial White cards and envelopes, 2 Avonlea B & T papers, 4 cardstock sheets (slate, smokey plum, chocolate and avonlea off-white), Slate epoxy bubbles, 5 yards grey organdy ribbon, instructional brochure and an exclusive to the kit C-size stamp set.


  These are my 15 cards - the instructions are so easy to follow with great colour photos and step by step cutting guide, stamping and assembly instructions. 

When I was finished with my 15 cards, I still had lots of cardstock, B & T paper, expoxy bubbles, and ribbon left.  So, with that in mind, I wanted to see what else I could create.


These are the additional 5 cards I created with no additional supplies, other than what had come in the kit!!!

For the designs, I used the new Make it From Your Heart - Volume 1 (page 11 of the Idea Book $7.95), inspiration from the Idea Book and a wee bit of my own creativity. 

I like how they all turned out. 


I never like to throw away any small scrap, but truly when I was finished there were only scraps of paper left.  I still have a few epoxy bubbles and quite a bit of the ribbon left.  I'll be able to use that in other scrapbooking projects!!

Enjoy and happy creating.

Jennifer  


Thursday 16 August 2012

September 2012: National Stamping Month


Isn't this an absolutely fabulous stamp set?  I know I love mine and have been busy creating cards to show you.  This is an incredible value - 2 D size stamp sets for only $5.00 with a $35.00 order from the Autumn/Winter 2012 Idea Book. 

Enjoy the video and happy crafting,

Jennifer

Wednesday 8 August 2012

A Sonoma Birthday Album

You may remember a birthday invitation I posted a few months ago which I created for my mom's 80th birthday celebration.  Well, I finally finished the pages from her celebration.  We had such a wonderful day together.  I absolutely love spending time with my brothers and sisters, my nieces and nephews and their sweet children, and had such fun catching up with cousins who we have not spent enough time with. 

I love the paper package Sonoma, which has retired.  I used every single piece of a number of paper packages for the invites and mom's album.  Although I'm sad to see it go, I'm happy to see new paper packages arrive in the Autumn/Winter 2012 Idea Book. 


I carried over from the invite the Sonoma flowers which were second generation stamped with Smokey Plum ink and made a smaller quilt block than on the invite.  Embellishments are from the Bohemian Assortment and the new Antiqued Gold mini medley along with some opaque adhesive gems from the brown assortment.


 Did you notice the two pages so the flip flaps could be used?  These are the 4 X 12 and 8 X 12 sizes.
This is What Matters Most - what truer words could ever be said.  Family, friends and faith, all together to celebrate.  This page shows the flip flaps open. 


Okay - I must confess  - - I did not make this page - nope not at all.  I did purchase this layout at Convention 2011 Disneyland, California.  The proceeds from my purchase went to Operation Smile a charity that CTMH supports.  I love this layout and was waiting for the most special pictures to use. 
 Yummy cake - my mom is a seamstress and quilter so her cake had to highlight her hobby.  My nephew's girlfriend is a pastry chef and she outdid herself with this custom designed cake.  Everything, even the wee fabric strips were edibile.  There were buttons, pins, scissors, fabric, it was incredible. 


More flip flaps so I could make sure to get in all the photos.  On the left side page at the bottom I have a poem I read to my mom that I still have to put on.  The poem is below.


Flip flaps open.  This is such a fantastic way to get lots of photos on your pages.  I used some of the Chocolate Velvet rub ons.  They are wonderful to use. 


This was a really simple page just letting the pictures and caption say it all.  Key Time Together.  I used some retired kraft borders inked chocolate.  I'm sad to see these retired but I still have a few in my stash!!!


Last page - I love the zip strips which are great for borders with an impact.  I again used the Bohemian Assortment and Heirloom Assortment to add the cluster of embellishments.


I hope you enjoyed these pages as much as I enjoyed making them.  I'm slowly catching up on some scrapbooking I have wanted to get at for a while.  I'm excited to receive my order of new goodies and I am anxiously watching my Purolator tracking slip.


Dear Lord, I am 80 and there’s much I haven’t done.  I hope dear Lord, you’ll let me live until I’m 81.

But, if I haven’t finished all I want to do, would you please let me stay awhile, until I’m 82?

So many places I want to go, so much I want to see, do you think you couild manage to make it 83?

Many things I may have done, but there’s so much let in store, I’d like it very much to live to 84.

And if by then I’m still alive, then I’d like to stay to 85.

The world is changing very fast, so I’d really like to stick around and see what happens to the world when I’m 86.

I know, dear Lord, it’s a lot to ask, and it will be nice in heaven, but I’d really like to stay around until I’m 87.

I know by then I won’t be fast, and sometimes I’ll be late, but it would be o-so-pleasant to be around at 88.

I will have seen so many things and had a wonderful time, so I’m sure that I’ll be willing to leave at 89.

(Well maybe.)

Happy crafting.

Jennifer
        

Thursday 2 August 2012

Project Inspiration 2012 Autumn/Winter Idea Book: Home Decor


Aren't these great projects.  I had the chance to see a number of the Advent Calendars made up at Convention.  Not everyone followed the "traditional" use - some were for children's barrette's, buttons in a sewing room, trinkets from your little ones.  Lots of great uses. 

The Scroll Album is simply stunning.  A great way to display your photos other than in the "traditional" photo album.  The scroll is a heavy wooden dowel and would look great with any decor.

How about getting these items for free!!!  Ask me how.

Until then, happy crafting,

Jennifer

Wednesday 1 August 2012

IT'S HERE - IT'S TIME

This is always an exciting time at CTMH - the launch of a new Idea Book.  The Autumn/Winter 2012 CTMH Idea Book does not disappoint.


For starters - 6 new colours have been added to the pallette, 8 new paper packages with patterns and colours to delight everyone.  Great Workshops on the Go for scrapbookers, card makers and home decor - as well as a great Halloween party planner.

Want to know the best thing.....


Introducting - ARTISTE -- a new Cricuti cartridge, exclusive to CTMH.  This cartridge is da bomb with 700  images - many of them 3D to make your projects pop. 

For only $99.00 you will receive the cartridge, three exclusive stamp sets, and 3 dimensional elements chipboard shapes.

The cute mini album posted earlier was made with the Dimensional Elements - Album Pages and images cut with the Artiste collection.

You could earn this cartridge half price - want to know how.....


Host a Home Gathering  - - With sales of only $250.00 you will receive $40.00 in free products and any one item in the Idea Book at 50% off!!!  What could be better than that.

I'm excited to share with you all the new products available from the Autumn/Winter 2012 Idea Book . 

I will be posting my class schedule in the coming weeks along with artwork - stay tuned!!

Until then, happy crafting


Jennifer 

Friday 27 July 2012

Project Inspiration 2012 Autumn/Winter Idea Book: Stepping Up Your Stamping


I know you'll find inspiration in this great video from Close to My Heart.

The Workshops on the Go are a terrific value and with step by step instructions your scrapbooking, home decor or card projects will be done in a snap. 

With each WOTG you'll receive an exclusive to that kit my acrylix stamp set, paper, embellishments and instructions to complete your project.  With the leftover pieces, you'll be able to create additional artwork with inspiration from the Idea Book, How To books or this video!!!

Enjoy & happy creating.

Jennifer
        

Sunday 22 July 2012

Convention this year was promised to be filled with hours of create & takes, crop projects, and fabulous artwork.  True to their word we had fabulous projects to complete. 


The Story of Us - Circles turned into squares layered on top of circles - go figure. 1 1/4" circles punched from Flirty paper package, 3 X 3 flip flaps, Love Blooms stamp set, and of course sparkles.  I love the new houndstooth irresitibles alphabet.  This title was sponged with new slate colour. 

 One Good Day -   Do you love the new colours of Ruby, Champagne, Slate, Whisper and Cashmere?  I know I do.  All of these colours are featured in this layout.  No patterned paper, just cardstock, the flowered paper is random stamped with Love Blooms.  The layout is completed with embellishments from Slate mini medley and Slate and Slate polka-dot ribbon.   
Havin Some Boot Stompin' Fun - that we were and this layout is packed with fun.  Noted canvas shapes, were easy to stamp on and just as effective left as they are.  Floret paper shapes, antiqued gold mini medley, and harvest assortment baker's twine provide the embellishments.  This paper package is Clementine with lagoon cardstock.  


STUDIO J - Digital Scrapbooking - No Thank you. That was my initial reaction when Studio J was first announced over a year ago.  Nope, not going to do digital - I need my paper, my stamps, ribbon, bling - I work on a computer all day long - not going to scrapbook on a computer.  Yep that was me, until.....The smarty pants at CTMH gave all Convention attendees 5 free digital layouts and instructions to complete for Convention.  I am not a computer wizard and I am not Studio J savy but I was able to complete my projects with all the great tips & tricks.   
 

Thank goodness we were given great instructions from CTMH to compose our layouts.  We didn't have to stick with their composition, but it did give great tips on changing paper colours, adding embellishments, stickease and ribbon.  This layout is of my handsome son, and beautiful daughter-in-law on their wedding day.  I am more than happy with how this turned out. 


I wanted to use a different paper package than in the instructions and went with Sonoma - one of my faves.  It was super easy to create the title, increase the size of the stickease and add the ribbon and bows where I wanted them placed.  Even the metal embellishments look like the real thing - until you touch!!


 This layout is actually from a halloween paper package and with a few clicks of the mouse the paper colour was changed.  These pictures were from Convention 2011 Disneyland.  I was even able to add the photo mats of whatever colour I wanted with Studio J.  


 My handsome grandpuppy Obi was the subject of this layout.  We created the cute hanging banners with brads in the centre of each.  The photos could be resized to the right size with the click and drag of my mouse.  Easy, sneasy, peasy.


I love how this layout turned out.  My son, Matt & his beautiful wife,  Jenna wanted a picture of all their guests.  This large photo well allowed me to expand the picture to capture everyone (almost) in this layout.  Their rings, jewellery and flowers were able to be captured up close in the small photo wells on the right.  Embellishments were overlayed and increased to highlight the simplicity of the page.


The fun part about Studio J is that you can also create and design your layouts for free!!! There is no charge to play, but if you choose you can purchase your layout and j-peg for a small fee.  Your layouts come with the memory protector page.  Try it for yourself at www.studioj.com and tell me what you think. 

I hope you've enjoyed the layouts and artwork created at the CTMH Convention.  I know I had fun making them.

Happy creating,

Jennifer   

Blog Hop - March Release Kraftin' Kimmie

        Woohoo!!!  Today we are celebrating all the fabulous new goodies in our March Release that are NOW available in the   Kraftin' K...